INTRODUCTION
Now a day, information is treated as one of the most important enterprise resource or factor of production. Organization’s performance has a direct relationship with the amount of accumulated and processed information that affects the organizations’ competitiveness and is treated as a strategic asset. The strategic assets are used to produce information based on products and services. Transformation of global and industrial economy, emergence of digital firm, social constraint and environmental awareness give rise to the fact that information system is essential for any organization in the twentieth century. All these facts and paradigms emerge a new era of development known as the “Information Age”. The key technology of the information age is communications. Data communication and networking is a truly global area of study, both because the technology enables global communication, and because new technologies and applications often emerge from a variety of countries and spread rapidly around the world.
1.1 ORIGIN OF THE REPORT
This Internship report has been prepared as the fulfillment of the partial requirement of Computer Science and Communication (CSC) program as authorized by the Director of Independent University, Bangladesh on 1st August, 2006.
1.2 PROJECT OVERVIEW
Transcom Electronics Ltd. (TEL) has designed its networking system with a
combination of LAN and MAN to insure the optimum automated system process. In the LAN of TEL there are 137 numbers of work stations with 13 Printers and a server with Windows NT 4.0 platform. This project is to migrate server OS from Windows NT 4.0 to Windows 2003 server and also integration of VLANs in the existing network structure.
1.3 OBJECTIVE OF THE REPORT
There are two types of objectives of the report
1.3.1 Specific objective of the Report
This report attempts to describe the design and installation procedure of a Virtual Local Area Network with the migration process from Windows NT 4.0 to Windows server 2003. In this report the working environment of different devices are also focused.
1.3.2 General objective of the Report
The general objective of this project is to complete the Internship. As per requirement of CSC program of Independent University, Bangladesh (IUB), one student needs to work in a business organization for three months to acquire practical knowledge of real business operation.
1.4 SCOPE OF THE REPORT
This study is likely to accomplish the information collection regarding the current Local Area Networking system management of TEL and depict the steps of the project to complete the new system. By working in the TEL, the opportunity is there to learn different managerial activities, reporting of different technological states. To find out the current technology practiced and implemented by the TEL the following procedures has been used for gathering information;
• Gathering information from the internal source of TEL
• Gather information from different networking solution installed in TEL office.
• Gather information with the help of different module books and prospectus of different switch, router equipment used by TEL.
• From the experience of learning and implementing the networking equipments by the organization to it’s Mohakhali office.
1.5 TYPE OF STUDY
Exploratory Research: The objective of research is to gather preliminary information that will help to define the problem and suggest hypotheses.
1.6 METHODOLOGY
The methodology that we have followed to develop the system was not a specific one. It can be said that the methodology followed was a hybrid of the traditional approach (System approach) and prototyping approach. The circumstances that lead us to take a hybrid approach are given as follows:
1.6.1 The Traditional Approach (System approach)
Many important features of the system were readily identified before the development began. Data requirements were possible to be identified in advance.
1.6.2 The Prototyping Approach
The system had to be developed quickly and at the lowest possible cost. Users had little experience with the type of system to be developed. The risk associated with delivering wrong system was high. According to Traditional approach for developing an information system the Internee divided the system development process into six formal stages that must be completed sequentially. These six stages are given below:
• System Analysis or Requirement Analysis
• System Design
• Implementation
• Testing
• Maintenance
1.6.2.1 System analysis
At first Internee performed System analysis and then system design. There are four different objective of the system analysis.
• Define the overall objective of the system.
• Identify the operation and problem of existing system.
• Identify the requirements and objective of the new system.
• Identify areas of required organizational change.
1.6.2.2 System design
The detailed equipments specifications, Installation of the equipment, documentations standards and software tools are responsible for system design. Objective of the system design are:
• Device detailed system solution
• Deliver the function requirement by the analyst and user.
• Manage the technical realization of the system.
1.6.2.3 Implementation
This phase consists of installation of the hardware equipments and software and establishing the data link.
1.6.2.4 Testing
In this part of the system is tested for the connectivity and wait for the last time changes.
1.6.2.5 Conversion
System life cycle stage consists of testing, training and conversion. And final steps required putting system into operation. As per the traditional approach, at first the requirement analysis of the system has been completed, which is covered in the later chapters.
1.7 Requirement Analysis
It is the stage for defining and prioritizing business requirements. This is perhaps the most important phase. Errors or omissions in requirement analysis result in user dissatisfaction with the final system. Some common features of requirement analysis of the system are as follows:
1. Establish what the new system must do.
2. Involves identifying who needs what information, where, when how.
3. Output-business requirements statement document.
CHAPTER TWO
COMPANY PROFILE
2.0 Trnascom Electronics Ltd.: At a glance
• Business Type: Manufacturer & Exporter
• Sales Volume :US$ 5,500,000 to 6,000,000
• Monthly Capacity: 4,500,000 pieces
• No of Total Staff: 223
• Year Established: 1962
• Brand Names: PHILIPS/TRANSTEC/SAINIK (Armed Forces)
• No. of Production Lines:4 Total/2 BH Group/2 SU Group
• Factory Size in Square Feet: 250,000
• Export Market: Worldwide
• OEM Services Provided: Yes
• Quality/Safety Approval: IEC 64 & 432/ISO 9002
• Product Range: Incandescent clear bulb/Incandescent Frosted bulb /Incandescent color bulb/Incandescent Argenta bulb /Anti-insect bulb
2.1 Information Systems & Automation Department (ISA)
Trnascom Electronics first introduced the concept of Information Systems & Automation (ISA) Department in Transcom Group.
At the beginning, ISA only supported Transcom Electronics. After the separation ISA is now supporting the whole Transcom Group. Now they support six other companies like Transcom Beverage, Transcom Food Limited, Transcom Distribution Limited, Smith-Kline Pharmaceuticals, Heritage Tea, and Transtek.
2.2 Major Activities of ISA Network Team
• Maintaining and Developing the network Infrastructure
• Implement and Design new projects.
• Make schedule for collect files/folders etc from every computers of Transcom Group to save as Backup of files/ Folders
• Secure the Network Systems from any threat
• Troubleshooting New Computers for organization use.
• Servicing the computers, printers, UPS etc of Transcom Group.
• Installation of Operating Systems and other Application Software.
• Installing new Printers, Modems, Network Devices and others accessories in any Location
• Train the Employees of Transcom Group.
• Monitoring the activities of the Users.
• Modify the Computers for batter organization support.
• Visit regularly to the important location for and ensure the best performance.
2.3 The ISA Team
The total manpower of ISA is 20. The head of the ISA team is ISA Manager Mrs. Rima Hossain Madani. ISA team is divided into two teams. One team is Software team and other team is Network and Hardware team.
2.4 Activities of Software team
Software team is responsible for maintaining the business software of TEL. The TEL’s software built on Microsoft Access (97 Version) Platform. Now software team is now updating the software in Visual Basic platform. Software team has one Database Administrator and six programmers and also responsible for developing web page of Transcom Group.
2.5 Activities of Network team
Network team is responsible for maintaining and developing the existing network system. They are also responsible to develop and modify the network system of whole Transcom Group. They also provide the maintenance support for the computers of Transcom Group. The network team has two Network Administrator, four Network Engineer, three Trainee officer, and two Network Technician.
2.6 Organizational Structure of ISA
CHAPTER THREE
COMPUTER NETWORKING OF TEL
3.0 FOREWORD
Networks are changing the way we do business and the way we live. Business decisions have to be made ever more quickly, and the decision makes require immediate access to accurate information. A network is a set of devices (often referred to as nodes) connected by media links. A node can be a computer, printer, or any other device capable of sending and/or receiving data generated by other nodes on the network. The links connecting the devices are often called communication channels. TEL has designed its networking system with a combination of Local Area Network (LAN) and Metropolitan Area Network (MAN) to insure the optimum automated system process.
3.1 LOCAL AREA NETWORKING OF THE TRANSCOM ELECTRONICS LTD.
A LAN is usually privately owned and links the devices in a single office, building, or campus. Depending on the needs of an organization and the type of technology used, a LAN can be as simple as two PCs and a printer in someone’s home office or it can extend throughout a company and include voice, sound and video peripherals. Currently, LAN size is limited to a few kilometers. LANs are designed to allow resources to be shared between workstations. In the LAN there are 137 numbers of work stations with 13 Printers and 2 different servers for different department of TEL.
3.1.1 Network Structure of TEL
The current network system of TEL was developed following the flat network structure. In the flat network structure every broadcast packet transmitted is seen by every device on the network; regardless of weather the device need to receive that data. So, all the users see all the devices by default. And it is not possible to stop devices from broadcasting, or stop users from trying to respond to broadcasts. So it creates a security problem for their valuable data.
Fig 3.1: Flat Network Structure
3.1.2 Client Server Network used in TEL
In a client-server environment like Windows NT 4.0 that is currently used in TEL, files are stored on a centralized, high speed file server computer that is made available to the employee’s work stations. Network access speeds are usually faster than those found on peer-to-peer networks, which is reasonable, given the vast numbers of clients that this architecture can support. Nearly all network services like printing and electronic mail are routed through the file server, which allows networking tasks to be tracked and help the ISA department of TEL to work efficiently and effectively
Fig 3.2: General Network setup Diagram of TEL.
Security is efficiently maintained with a server-based network, as all users are authenticated by the fileserver before being able to access network resources. ISA of TEL insures the total LAN with the highest level of security.
3.2 ISA LAN Activities
Transcom Electronics has 137 computers. Every computers of TEL is more or less important for day-to-day operation. So ISA set a Local Area Network for TEL.
ISA successfully set a LAN between the 137 PCs of Transcom Electronics in a Domain. The Domain name for Transcom Electronics is Mohakhali Domain. Though they related with X-Net. So they assign a class C IP address for the intranet work with the help of X-Net. The Mohakhali Domain’s IP series is started from
10.168.1.XXX
Table 3.1: DNS IP addresses
Primary DNS 10.168.2.5
Secondary DNS 203.105.136.11
Table 3.2: Information of the Domains and their IP series are following:
Domain Name
IP
Gulshan (Corporate office, TDCL, TBL Head office, TFL, Tea, SK-F animal) 10.168.2.XXX
Mirpur (SK-F factory)
10.168.3.XXX
Motijheel (SK-F head office)
10.168.4.XXX
Tongi (SK-F factory & TBL Plant)
10.168.5.XXX
Mohakhali (TEL, TDCL, TFL warehouse)
10.168.1.XXX
Pizzahut ( Resturent)
192.168.1.XXX
3.3 The Network Diagram of Mohakhali
Fig 3.4: 3rd Floor Network & PC Setup in the Building of TEL Mohakhali
Fig 3.5: 2nd Floor Network & PC Setup in the Building of TEL Mohakhali
Fig 3.6: Ground Floor Network & PC Setup in the Building of TEL Mohakhali
3.4 EMPLOYEES ACCESS PROCESS IN TEL NETWORK
Transcom Electronics Limited has 149 pcs (137 pcs are in Mohakahali Office, 5 pcs are present in showroom and 7 pcs are present out of Dhaka (Chittagong, Bogra and Khulna). Only 137 pcs are connected in the network (Mohakhali). Rest of the pc users of branch office communicates with Mohakhali office through Internet (email). Below showing common access process to client Computers
Step 1:
Fig 3.7: Accessing Network from the desktop
Step 2:
Fig3.8: Domain in Mohakhali
Step 3:
Fig 3.9: Node in the Mohakhali Domain controller
Step 4:
Fig 3.10: Workstation shears file in the network.
3.5 OPERATING SYSTEM
Operating Systems are one of the important factors for the network. Operating Systems play an important role in the network. They strongly related with Servers, Domain etc.
3.5.1 The list of the Operating Systems used in TEL PCs
• Windows 98 Second Edition
• Windows XP professional
• Window NT 4.0
• Windows 2003 server
• Windows 2000 Advance Server
3.5.2 Application Software
• MS Office 97 and MS Office 2000.
• WinZip
• TEL Sales System
• TEL Light System
• McAfee Security (McAfee Virus Scan Enterprise ver. 8.0i)
• Zone Alarm Pro
• Out look Express 6.
3.6 PROBLEM OF THE EXISTING SYSTEM
TEL is using a flat network system and a flat network’s security used to be tackled by connecting hubs and switches together with routers. So it was basically the router’s job to maintain security. This arrangement was pretty ineffective for several reasons.
A. Any one connecting to the physical network could access the network resources located on that physical LAN.
B. All anyone had do to observe any and all traffic happening in that network was to simply plug a network analyzer into the hub.
C. In that same vein, users could join a workgroup by just plugging their workstations into the existing hub. So basically this was non security.
These problems can be solved by using VLANs that will create multiple broadcast groups, and administrator can have control over each port and user. In a VLAN users cannot plug their workstation into any switch port and gain access to network resources, because the administrator will have the sole control over each port and whatever resources that port can access.
Also because VLANs can be created in accordance with the network resources a user requires, switches can be configured to inform a network management station of any unauthorized access to network resources.
Besides there are some other problems like:
• Frequent Windows NT pc hang and crash.
• Maximum utilization of latest hardware is not being possible in the existing NT 4.0 server system.
• Number of backup domain controller is large which is difficult to control.
• Security problem. Data are not secured with the existing system.
• User gets their resources from one PDC, so it requires more time for updating user service.
To get rid of these problems and build an optimum system the server operating system need to be migrated from Windows NT 4.0 to Windows server 2003 as Windows server 2003 overcomes all the lacking of NT 4.0 server. Besides the network structures need to be upgraded to VLANs.
CHAPTER FOUR
IMPLEMENTATION OF VLAN
4.0 VLAN (Virtual Local Area Network)
VLAN is logical segmentation of functions, project teams, or applications regardless the physical location of users. For example, several end stations might be grouped as a department, such as engineering or accounting. When the end stations are physically located close to one another, then it is possible to group them into a LAN segment. If any of the end stations are in different buildings (not the same physical LAN segment), even then those can be group into a VLAN.
Fig 4.1: VLANs Spanning Multiple Switches and Multiple Floors
4.1 HARDWARE REQUIREMENTS
To reconstruct the network system in VLAN some changes in the hardware were required. Especially manageable switches that can provide layer 3 services in place of existing non-manageable switches. Cisco Catalyst 3560G was selected as the best one to work with.
4.2 SWITCHED NETWORK
In a switched network only the destination port receives the broadcast message forwarded by the host. This system can solve many of the problems associated with layer 2 switching with VLANs. In the following figure we can see host A sending a frame with Host D as its destination, that frame is only forwarded out the port where Host D is located.
Fig 4.2: Switched Networking
4.3 VLAN IN TRANSCOM ELECTRONICS LTD.
Transcom Electronics Ltd. has a mix setup for its employees sitting arrangement which includes marketing, accounts, sales, and ISA department all together in the same place. Some part of the marketing department sit in the first floor and few sited in the top floor of the same building and rest sit in another building. Now to create a secured date sharing traditional LAN is not applicable. So TEL has decided to implement Virtual Local Area Networking in to its Mohakhali office which will allow them to utilize optimum technological advancement.
TEL decided to create four VLAN in their network:
• Marketing VLAN
• Accounts VLAN
• Sales VLAN
• ISA VLAN
To creating VLAN name on a catalyst switch 3560G enter following configuration command on the terminal.
Creates VLAN Command: vlan 2 name name
Example:
3560G>
3560G>en
3560G#config t
3560G (config)#vlan
3560G (config-vlan)#vlan 2
3560G (config-vlan)#name Marketing
3560G (config-vlan)#^Z
3560G#
To see the VLAN database use the show vlan command
4.4 VLAN MEMBERSHIPS
VLAN memberships were used for assigning switch port to VLAN. User can configure either static memberships or dynamic member on a port.
• Static VLANs: Static VLANs are the usual way of creating VLANs, and they’re also the most secure. The switch port that we assign a VLANs association to always maintain that association until an administrator manually changes that port assignment. This type of VLAN configuration is comparatively easy to set up and monitor, and it works well in a network where the movements of users within the network is controlled. And although it can be helpful to use network management software to configure the ports, but it’s not mandatory.
• Dynamic VLANs: A dynamic VLAN determines a node’s VLAN assignment automatically. Port assignments are done by the Using intelligent management software. This type of VLAN configuration is comparatively difficult to set up and monitor.
Static VLAN was proved to be the right option to choose over dynamic VLAN –
Static VLAN is:
• More secure than dynamic VLAN.
• Easy to configure and monitor.
• Efficient in the network because our user movement is limited.
• Flexible regarding the configuration of the ports. No need of network management software.
In TEL we use static VLAN membership on a port. To configure the port we need to follow the following procedure:
3560G (config-if)#int f0/2
3560G (config-if)#switchport access vlan 2
3560G (config-if)#int f0/3
3560G (config-if)# switchport access vlan 3
3560G (config-if)#int f0/4
3560G (config-if)# switchport access vlan 4
3560G (config-if)#int f0/5
3560G (config-if)# switchport access vlan 5
3560G (config-if)#
To verify the configuration use the show vlan command on the terminal.
Fig 4.3: Network structure of marketing department floor after implementing VLAN
4.5 LINK TYPE USED IN SWITCH ENVIRONMENT
Trunk link was used to build the internetwork between the switches, routers and servers. Actually trunk link is a 100 – 1000mbps point to point link between two switches, between a switch and router, or between a switch and server. These links carry the traffic of multiple VLANs at a time.
Benefit of the trunk link
• Trunking allows making a single port part of multiple VLANs at the same time.
• Another benefit to trunking is when you are connecting switches. Trunk links can carry some or all VLAN information across the link, but if the links between your switches aren’t trunked, only VLAN 1 informatrion will be switched across the link by default.
Fig 4.4: Use of trunk link to connect two switches.
Configuration of trunk ports are shown
3560G#config t
3560G (config)#int f0/12
3560G (config-if)#switchport mode trunk
3560G (config-if)#^Z
3560G#
When a trunked link is created all VLANs are allowed to pass data by default.
4.6 VLAN Trunk Protocol (VTP)
VLAN Trunk Protocol was used to manage all configured VLANs across a switch internetwork & maintain consistency. All switches are configured a VTP server by default. To configure a VTP first configure the domain name. When creating VTP domain it allows an administrator to add, delete, & rename VLANs and set password, operation mode and pruning capabilities of the switch.
VTP provided following benefits:
– Permits trunking over mixed networks.
– Accurate tracking.
– Dynamic reporting.
– Plug-and-Play facility.
A configuration of VTP is given below:
3560G (config)#vtp mode server
3560G (config)#vtp domain transcom
3560G (config)#vtp password 123456
3560G (config)#vlan 2
3560G (config)#name Marketing
3560G (config)#vlan 3
3560G (config)#name Sales
3560G (config)#^Z
By using the show vlan brief command we can verify our configuration.
4.7 ROUTING BETWEEN VLANS
As there is four VLANs in the system, routing between VLANs became a necessity. It allowed us to build the interconnectivity between VLANs. For doing this we need a router. When configure a router we must create four subinterfaces- one for each VLAN.
The following commend are needed when configure a router
Router>enable
Router#config t
Router(config)#hostname Trunkrouter
Trunkrouter(config)#int f0/0
Trunkrouter(config-if)#no ip address
Trunkrouter(config-if)#no shutdown
Trunkrouter(config-if)#int f0/0.1
Trunkrouter(config-subif)# ip address 10.168.1.2 255.255.255.0
Trunkrouter(config-subif)# encapsulation dotlq 1
Trunkrouter(config-subif)# int f0/0.2
Trunkrouter(config-subif)# ip address 10.168.1.33 255.255.255.0
Trunkrouter(config-subif)# encapsulation dotlq 2
Trunkrouter(config-subif)# exit
Checks the router configuration we need to type show run commend Trunkrouter commend line.
4.8 EFFECTS OF VLANS IN TEL
VLANs provide the following advantages:
• Simplification of end-station moves, adds, and changes
When an end station is physically moved to a new location, its attributes can be reassigned from a network management station through Simple Network Management Protocol (SNMP) or through the user interface menus. When an end station is moved within the same VLAN, it retains its previously assigned attributes in its new location. When an end station is moved to a different VLAN, the attributes of the new VLAN are applied to the end station.
• Controlled traffic activity
It allowed the ports on the same or different switches to be grouped so that traffic is confined to members of only that group. This feature restricts broadcast, unicast, and multicast traffic (flooding) only to ports included in a certain VLAN. The management domain is a group of VLANs that are managed by a single administrative authority.
• Workgroup and network security
It increased security by segmenting the network into distinct broadcast domains. To this end, VLANs can restrict the number of users in a broadcast domain. VLANs also control the size and composition of the broadcast domain by controlling the size and composition of a VLAN.
• Block broadcast storm
Now it is possible to block broadcast storm caused by a faulty network interface card as well as prevent an intermediate device from propagating the storms throughout the entire network.
CHAPTER FIVE
OPERATING SYSTEM MIGRATION
5.0 EXISTING WINDOWS NT 4.0 ENVRONMENT
The TEL Corporate environment consists of the following:
• One domain, named mohakhali, which is running Windows NT 4.0.Five servers: the PDC, which is running on new server hardware purchased six months ago, 3 BDC, and a member server, both running on latest server hardware.
• The internal DNS as well as DNS services provided by an Internet Service Provider (ISP).
• Remote Access Service, file service, and print services running on the Windows NT 4.0 servers.
• Several different client operating systems, including Microsoft® Windows® 98, Windows® 2000 Professional, and Windows® XP
Fig 5.1: Environment for Transcom with NT 4.0
The TEL IT department ISA set the following goals for their migration:
• Upgrade the Windows NT 4.0 domain to a Windows Server 2003 Active Directory domain.
• Consolidate services onto two server, running Windows Server 2003.
To complete the operating system migration from Windows NT 4.0 to Windows Server 2003 ISA divided migration into the following steps:
1. Selecting a migration path
2. Assigning server roles
3. Designing the new Windows Server 2003 domain
4. Test and recovery
These steps are described in the later section of this chapter.
5.1 SELECTING MIGRATION PATH
Before migrating from Windows NT 4.0 to Windows Server 2003, TEL has to select the migration path that fulfills all the needs of the organization. There were two main considerations –
5.1.1 Evaluate Existing Hardware
The domain controller in current environment is capable of running Windows Server 2003. Upgrade this domain controller in place to establish Windows Server 2003 Active Directory domain, the domain controller must be the PDC; and in TEL the domain controller exists in PDC mode.
The following figure 5.1 summarizes the process for evaluating current hardware to determine which server, if any, in current environment will upgrade to Windows Server 2003 to establish new Windows Server 2003 domain.
Fig 5.2: Evaluation of existing Hardware
5.1.2 The operating System
The main consideration was whether the current server operating system NT 4.0 had service pack 5 or latter installed or not. It was found that service pack 6 was installed already.
5.2 ASSIGNING SERVER ROLES
To migrating from a Windows NT 4.0 environment to Windows Server 2003, it was important to plan for future server role assignments. This involves completing the following steps.
5.2.1 Documenting server role services
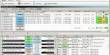
Document the services that each server provides in the current environment. The gist is organized in the following table:
Table 5.1: Servers and Services in the Current Environment for TEL
Server Name
Server Role Services
TEL01
PDC Domain Controller, DNS server
TEL02 BDC Backup Domain Controller, Remote Access
TEL03 BDC Backup Domain Controller, Print server
TEL04 File Server
Print Server File server, print server
TEL05
BDC Backup Domain Controller
5.2.2 Assign new server role
Assign the server roles in new environment, and documenting those assignments. To assign server roles in new environment, first had to assign the domain controllers in existing environment roles in new Windows Server 2003 domain. Then member server and rollback server was assigned consequently.
After TEL assigned server roles to server hardware and established their capacity requirements, ISA listed the sequence of tasks to be performed in order to place the server roles. These include the following:
• Deploy TEL 01 as the Domain controller in Windows server 2003 from PDC of Windows NT 4.0 server.
• Deploy TEL 02 the BDC in the previous system as the second domain controller in the windows server 2003 domain.
• Migrate the Remote Access Service, DNS, WINS currently running on TEL 01, and TEL 02.
• TEL 03 was assigned as the rollback server.
• TEL 04 was assigned as file and print server.
• TEL 05 became a workstation.
The changes in the role that will take place for these actions are depicted in the following table –
Table 5.2: Server Role Assignments
Server Name Meets hardware requirements? Role before upgrade Role after upgrade
TEL 01 Yes
Windows NT 4.0 PDC, WINS & DNS server Windows Server 2003 domain controller
WINS & DNS server
Remote Access Server
TEL 02 Yes Windows NT 4.0 BDC Windows Server 2003 domain controller
DNS & WINS server
Remote Access Server
Print server
TEL 03 Yes Windows NT 4.0 BDC Rollback Server
TEL 04 Yes File & Print Server
File & Print Server
TEL 05 Yes Windows NT 4.0 BDC Workstation
5.2.3 IP address & Network adapter information
Evaluating the existing network configuration, including IP address and network adapter information for each server. The existing network configuration for Windows NT 4.0 domain was evaluated to determine whether it is sufficient for new Windows Server 2003 domain. The findings are described in the following table –
Table 5.3: Server Network Configuration
Server Name Network Adapter IP Address Subnet Mask Default Gateway
TEL01 Netgear FA310TX Fast Ethernet Adapter 10.168.1.21 255.255.255.0 10.168.2.5
TEL02 Netgear FA310TX Fast Ethernet Adapter 10.168.1.25 255.255.255.0 10.168.2.5
TEL03 IBM Netfinity Fas Ethernet Adapter 10.168.1.40 255.255.255.0 10.168.2.5
TEL04 IBM Netfinity Fas Ethernet Adapter 10.168.1.31 255.255.255.0 10.168.2.5
5.3 DESIGNING THE NEW WINDOWS 2003 SERVER DOMAIN
Before begin migration process, it is important to design new Windows Server 2003 domain. This involves creating an Active Directory logical structure design and planning for DNS.
5.3.1 Consideration for Upgrading to Windows Server 2003 Active Directory
The factors that can affect the upgrade process of Windows NT 4.0 domain to Windows Server 2003 Active Directory are –
• PDC Offline Operations- PDC is offline during most phases of the upgrade process, typically between one and three hours. In this time user can access their resources form BDC. During this time user can not do any write operation in the domain controller. So, operations that require data to be written to the domain will not succeed during this time.
• Client Authentication- TEL includes client computers that are running Microsoft® Windows® 2000 or Windows® XP operating systems in the domain, and in these cases, it is recommended to upgrade all Windows NT 4.0–based domain controllers as quickly as possible. This is because all Windows 2000 and Windows XP clients will only use Windows Server 2003 domain controllers for logon after the PDC is upgraded.
• LAN Manager Replication Service and File Replication Service – During the upgrade process, for a period of time one or more domain controllers might be running Windows Server 2003 while others are still running Windows NT 4.0. Windows Server 2003 and Windows NT 4.0 domain controllers use different file replication services. Files that were replicated between domain controllers, such as logon scripts, were needed to manage them separately.
5.3.2 Security policy consideration for updating to windows 2003 server Active Directory
• Server message block (SMB) Packet Signing
SMB packet signing is a security mechanism that protects the data integrity of SMB traffic between client computers and servers, and prevents man-in-the-middle attacks by providing a form of mutual authentication. This is done by placing a digital security signature into each SMB packet, which is then verified by the receiving party. Server-side SMB signing is required by default on Windows Server 2003–based domain controllers, which means that all clients are required to have SMB packet signing enabled.
• Secure Channel Signing and Encryption
When a computer becomes a member of a domain, a computer account is created. Each time the computer starts, it uses the computer account password to create a secure channel with a domain controller for its domain. This secure channel is used to ensure secure communications between a domain member and a domain controller for its domain. Secure channel signing is required by default on Windows Server 2003–based domain controllers, which means that all clients must enable secure channel signing and encryption
5.3.3 Completing pre-upgrade tasks.
Before upgrade Windows NT 4.0 domain to Windows Server 2003 Active Directory, must complete the following pre-upgrade tasks:
1. Relocate the LMRepl file replication service.
2. Migrate the Remote Access Service.
3. Prepare for file and print service upgrade.
4. Enable the Windows NT 4.0 environment change freeze.
5.3.4 Upgrading the PDC
To upgrade Windows NT 4.0 environment to a new single domain forest, user must complete some or all of the following tasks:
5.3.4.1 Back up all domain data.
Back up the following information and store the backup media in a secure offline location
• Back up the PDC.
• Back up the BDC that was designated as the rollback server.
• Test all backup media to ensure that the successful retoration.
5.3.4.2 Delegate the DNS zone for the new Windows Server 2003 domain,
TEL has an existing DNS infrastructure and the current network diagrams and DNS domain hierarchy diagrams were reviewed carefully. In preparation for the deployment of the single domain forest, create a delegation for the DNS servers that will be running on the domain controllers in the Windows Server 2003 domain. Create the delegation by adding DNS name server (NS) and address (A) resource records to the parent DNS zone.
Name Server (NS) creation:
forest_root_domain IN NS domain_controller_name
Address (A) creation:
Domain_controller_name IN A domain_controller_ip_address
Here, TEL PDC name is TEL01, and its IP address is 10.168.1.21. During the Active Directory installation, TEL will install the DNS Server service on this domain controller. In preparation for that step, the DNS administrator for TEL created the following DNS resource records in the parent zone, transcom.com:
Name server (NS)- transcombd IN NS TEL01.transcombd.transcom.com
Address (A) – TEL01. transcombd.transcom.com IN A 10.168.1.21
5.3.4.3 Identify potential upgrade problems.
Before upgrading the operating system to Windows Server 2003, Winnt32.exe command-line tool was used to identify any potential upgrade problems, such as inadequate hardware resources or compatibility problems.
5.3.4.4 Upgrade the operating system of the Windows NT 4.0 PDC.
Complete the operating system installation by doing the following
1. Check weather static IP address was use.
2. Use NTFS partitions. Because the installation of Active Directory will not succeed if there is no NTFS partition available on which to locate the SYSVOL shared folder.
3. Select Upgrade for the Installation type.
4. Configure DNS client settings by using the IP address of the closest DNS server for the Preferred DNS Server settings.
5. Install Windows Support Tools, which are available in the \Support\Tools folder on the Windows Server 2003 operating system CD.
During the operating system upgrade the computer took restart three times. Once upgrade of the operating system on a Windows NT 4.0 domain controller to Windows Server 2003, the computer is in an intermediate state, meaning that the computer is no longer a Windows NT 4.0–based domain controller, and it is not a Windows Server 2003–based member server or domain controller until Active Directory is installed. After the computer restarts for the last time, the Active Directory Installation Wizard appeared.
5.3.4.5 Install Active Directory.
Proceed immediately with the installation of Active Directory by completing the Active Directory Installation Wizard. The Active Directory Installation Wizard creates the Active Directory database and moves objects from the Windows NT 4.0 Security Account Manager (SAM) to the Active Directory database.
Table 5.4 lists the actions required to complete the Active Directory installation wizard on a Windows NT 4.0 PDC, and lists sample data for installing Active Directory on the first domain controller in the domain forest for TEL01.
Table 5.4: Information for Installing Active Directory on a Windows NT 4.0 PDC
Wizard Page or Dialog Box Action Example
Create New Domain
Select Domain in a new forest
New Domain Name Type the full DNS name of the domain. Transcombd.Transcom.com
Forest Functional Level Choose Windows Server 2003 interim. This is the preferred level because replication is more efficient when any one is operating at the Windows 2003 interim functional level than when operating at the windows NT 4.0 functional level. Because Transcom does not plan to add any Windows
2000–based domain controllers to their forest at any time, they chose the Windows Server 2003 interim forest functional level.
Database and Log Folders Type the specified folder locations. The design for Transcom domain controllers specifies that the database folder and log folder remain in the default location: C:\Winnt\NTDS.
Shared System Volume Type the specified folder locations. C:\Winnt\SYSVOL
DNS Registration Diagnostics Select the option to Install and configure the DNS server on this computer and set this computer to use this DNS server as its preferred DNS server.
Permissions Select the permission compatible with pre Windows 2000 server operating systems. Permission compatible only with Windows 2000 or Windows server 2003 operating system. Because Transcom currently has services running on windows NT4.0 –based servers under the context of the Local System account, they selected Permissions compatible with pre-Windows 2000 server operating systems.
Directory Service Restore Mode Administration Password In the Password and Confirm password boxes, type any strong password.
When the Active Directory Installation Wizard operation is complete, verify that all information on the Summary page is accurate, and then click Finish. After the Active Directory Installation Wizard finished, there will be a prompt to restart the computer. The installation will not be complete until the computer restarts.
5.3.4.6 Configure the Windows Time Service.
The Windows Time Service provides time synchronization to peers and clients, which is ensures that time is consistent throughout an organization. This service was configured in TEL01 domain controller, deployed to synchronize from a valid Network Time Protocol (NTP) source.
The configuration procedures are given below:
1. Log on to the domain controller.
2. at the command line, type:
W32tm /config /manualpeerlist:peers /syncfromflags:manual
3. Update the Windows Time Service configuration. At the command line, type:
W32tm /config /update
5.3.4.7 Verify DNS server recursive name resolution
DNS server recursive name resolution is configured automatically during the Active Directory installation process. If the selected design specifies a different configuration, the DNS snap-in or Dnscmd.exe can be use to modify these settings. Use the DNS snap-in to verify DNS server recursive name resolution based on the information in following table.
Table 5.5: Information to Verify DNS Server Recursive Name Resolution
Method
Configuration
Recursive name
resolution
by root hints • No additional configuration is necessary. When the DNS server specified as the Preferred DNS server during the installation process is correctly configured, the root hints are automatically configured. To verify the root hints by using the DNS snap-in:
• In the console tree, right-click the domain controller name, and then click Properties.
• In the Properties sheet for the domain controller, view the root hints on the Root Hints tab.
Recursive name resolution by forwarding • Forward unresolved queries to specified DNS servers. To verify forwarding by using the DNS snap-in: In the console tree, right-click the domain controller name, and then click Properties.
• On the Forwarders tab, in the Forwarders list in the selected domain, verify that the IP addresses match those specified design.
5.3.4.8 Perform post-upgrade tests
After the Active Directory Installation Wizard completes, verify that the Active Directory installation was successful. Review the Windows Server 2003 event log for any errors.
5.3.4.9 Modify security policies.
Default security policies might have to be modified to ensure that clients running earlier versions of the Windows operating system can access domain resources in the new Windows Server 2003 domain.
In order to increase security, Windows Server 2003–based domain controllers require by default that clients attempting to authenticate to them use SMB packet and secure channel signing. Clients running the Windows 95 operating system without the Directory Service Client Pack or Windows NT 4.0 with Service Pack 2 and earlier do not support SMB packet signing and will not be able to log on or access domain resources on the network. Clients running Windows NT 4.0 with Service Pack 3 and earlier do not support secure channel signing and will not be able to establish communications with a domain controller in their domain.
The most secure way to enable these clients to log on and access domain resources on the network is to apply either the appropriate service pack or the Directory Service Client Pack. If it cannot apply either of these, configure all Windows Server 2003–based domain controllers to not require SMB packet signing and secure channel signing. To do this, disable the following settings in the Default Domain Controllers Policy:
• Microsoft network server: Digitally sign communications (always)
• Domain member: Digitally encrypt or sign secure channel data (always)
If modify these policies, the default security policies are weakened. But this is necessary to ensure that some clients running earlier version of windows can access domain resources.
To make SMB packet and secure channel signing optional on Windows Server 2003 domain controllers the following activities were required:
1. Open Active Directory Users and Computers, right-click the Domain Controllers container, and then click Properties.
2. Select the Group Policy tab, and then click Edit.
3. Under Computer Configuration, navigate to Windows Settings\Security Settings\Local Policies\Security Options.
4. In the details pane, double-click Microsoft network server: Digitally sign communications (always) and then click Disabled to prevent SMB packet signing from being required.
5. Click OK.
6. In the Details pane, double-click Domain member: Digitally encrypt or sign secure channel data (always), click Disabled to prevent secure channel signing from being required, and then click OK.
7. To apply the Group Policy change immediately, either restart the domain controller, or run the gpupdate /force command
Several tests were performed that were defined in the test plan to determine whether the Active Directory configuration is functioning correctly. Once they work properly upgrade process was complete. The testing process describe later on this chapter.
5.3.5 Upgrading additional domain controllers.
After upgrade the operating system and install Active Directory on the Windows NT 4.0 PDC, add another Windows Server 2003 domain controller to the domain as soon as possible. This provides redundancy for any clients running in the environment. Add additional domain controllers to the Windows Server 2003 domain by upgrading Windows NT 4.0–based BDCs and installing Active Directory.
To complete the process for upgrading additional domain controllers, perform the following tasks:
1. Upgrade the operating system of Windows NT 4.0 BDC.
2. Install Active Directory.
3. Install DNS on additional domain controllers.
4. Reconfigure the DNS Service.
5. Add Windows NT 4.0 BDCs to the Windows Server 2003 domain.
6. Perform post-upgrade tests.
5.3.5.1 Upgrade the operating system of Windows NT 4.0 BDCs
Install windows server 2003 operating system on the BDC.
5.4.5.2 Install Active Directory
After upgrading the operating system on a Windows NT 4.0 additional domain controller to Windows Server 2003, the computer is in an intermediate state, meaning that the computer is no longer a Windows NT 4.0 domain controller, nor is it a Windows Server 2003 member server or domain controller.
Table 5.6 lists information for installing Active Directory on additional domain controllers, as well as sample data for installing Active Directory on additional domain controllers in the Transcom domain forest. Transcom use the dcpromo /adv command to install Active Directory on a server by copying directory data over the network from a domain controller.
Table 5.6: Installing Active Directory on Additional Domain Controllers
Wizard Page or Dialog Box Action Example
Additional Domain Controller Select the computer to become an additional domain controller for the domain. Transcom selected a BDC for installing additional domain controller. They will install Active Directory using the dcpromo /adv command.
Domain Controller Type Select Additional domain controller for an existing domain. When initiates the Active Directory Installation Wizard by using the dcpromo /adv command, the first wizard page appears.
Copying Domain Information Select Over the network from a domain controller From these restored backup files. Transcom copy domain information from the first domain controller that is deployed, TEL01, which is in the same location as the new one. Therefore, they selected Over the network from a domain controller to copy the information in the shortest time.
Network Credentials Type the user name and
password of an account with sufficient administrative credentials to install Active Directory on this computer, and the fully qualified domain name of the domain in which the computer will become an additional domain controller
Additional Domain Controller Type the full DNS name of the forest root domain. transcombd.transcom.com
Database and Log Folders Type the folder locations Database folder: C:\Windows\NTDS
Log folder: C:\Windows\NTDS
Shared System Volume Type the folder locations C:\Windows\SYSVOL
Directory Service Restore Mode Administration Password In the Password and Confirm password boxes, type any strong password.
Verify that all information on the Summary page is accurate, and then click Finish. After the Active Directory Installation Wizard finishes and prompted to restart the computer. The installation is not complete until the computer restarts.
5.3.5.3 Install DNS on additional domain controllers
Install DNS on additional domain controllers perform the following configuration :
• In Control Panel, double-click Add or Remove Programs, and then click Add/Remove Windows Components
• In Components, select the Networking Services check box, and then click Details
• In Subcomponents of Networking Services, select the Domain Name System (DNS) check box, click OK, and then click Next
• If prompted, in Copy files from, type the full path to the distribution files and then click OK. The required files will be copied to hard disk
5.3.5.4 Reconfigure the DNS Service
After deploying additional domain controllers in a domain forest, do the following to reconfigure the DNS service:
• Configure the DNS client settings of the first and subsequent domain controllers.
• Update the DNS delegation
5.3.5.5 Add Windows NT 4.0 BDC to the Windows Server 2003 domain
To add a Windows NT 4.0 BDC to a Windows Server 2003 domain
• In Active Directory Users and Computers, right-click the Domain Controllers folder
• Point to New, and then click Computer
• Type the computer name of the BDC
• Ensure that the check boxes are selected for Assign this computer account as a pre-Windows 2000 Computer and Assign this computer account as a backup domain controller
• Install the BDC in the domain
5.3.5.6 Perform post-upgrade tests
After upgrade the additional domain controller, verify that the upgrade was successful. Use the tests tools to verify that the up gradation is successful.
5.3.6 Completing post-upgrade tasks
After upgrade all domain controllers in the domain to Windows Server 2003, complete the following post-upgrade tasks:
• Eliminate anonymous connections to domain controllers.
• Raise domain and forest functional levels.
• Redirect the Users and Computers containers.
• Complete the upgrade.
5.3.7 Complete the Upgrade
Complete the following tasks to finalize the upgrade process:
• Review, update, and document the domain architecture to reflect any changes that made during the upgrade process.
• Review operating procedures and administrative tasks to determine whether new Windows Server 2003 features, such as Group Policy objects or distributed administration, affect the operations environment.
• Ensure that Windows Server 2003 Active Directory environment is operating successfully for a period of time and redeploy the rollback server that reserved for the recovery process. Maintain the backup of the rollback server for a longer period of time for additional security.
5.4 Planning for test and recovery
Once the up gradation was over, testing came into action to scrutinize the system.
5.4.1 Develop a Test Plan
Develop a plan for testing in-place domain upgrade procedures throughout the in-place domain upgrade process to ensure that they have completed successfully and to determine whether the process of upgrading Windows NT 4.0 domains to Windows Server 2003 Active Directory was successful.
The following table shows the Active Directory functionality test component.
Table 5.7 Active Directory Functionality Test Components
Function
Test
Method
New user creation
Create a new user on the Windows Server 2003 domain controller. • Log on with administrator credentials and use Active Directory Users and Computers to verify that the new user was created successfully.
New user object replication After replication to BDCs takes place, determine whether new user is replicated to BDCs.
• Type user name at a command prompt on a Windows NT 4.0 domain controller, and then verify that the new user account exists.
• Modify a property of an existing user and verify that the modified property replicates with the user.
Successful logon request
Verify that users can log on successfully. • Disconnect the 2003 domain controller to confirm that the NT 4.0 domain controller is validating the user logon request.
• Verify that administrator can log on successfully by using the new user account credentials from each client computer.
• Verify that all client operating systems in the upgraded domain and the domains that it trusts can log on successfully.
Successful resource access
Verify that the user can access important resources. • Access e-mail resources.
• Access roaming profiles.
• Access printers.
• Resource permissions belonging to the user and a group.
5.4.2 Develop a Recovery Plan
Create a recovery plan for use if the domain upgrade process does not go as planned. Select a Windows NT 4.0 BDC to be used as a rollback server. Synchronize the BDC with the PDC and take the rollback server offline in the event that it must be promoted to a PDC to restore the domain to its original state.
5.4.3 Restoring the Domain to its Original State
If upgrade process fails, roll back a Windows Server 2003 Active Directory domain to its original state as a Windows NT 4.0 domain. Roll back the deployment to its original state in one of two ways:
• Remove (either by disconnecting the network cable or turning off) any Windows Server 2003–based domain controllers from the domain.
• Promote a Windows NT 4.0 BDC to become the PDC.
• Synchronize all Windows NT 4.0–based domain controllers.
• Test Windows NT 4.0 server operations and domain validation.
• Resolve the issues that caused the domain upgrade to fail, and begin the upgrade process again.
Or
• If a failure occurs after performing the steps above, remove all Windows Server 2003–based domain controllers from the network and promote the Windows NT 4.0 BDC that is designated as the rollback server to become the PDC.
• Perform a full synchronization of all Windows NT 4.0 BDCs.
• Test Windows NT 4.0 server operations and domain validation.
• Resolve the issues that caused the domain upgrade to fail, and begin the upgrade process again.
5.5 BENEFIT OF THE NEW SYSTEM
1. Finding Information Quickly -Active Directory is a database of information about users, computers, printers, and just about any computer-related item in the enterprise. So user can find their information quickly.
2. Enhanced server security – Administrators can easily define and automatically enforce software security policies.
3. Device Driver Roll Back – If user installs a new device driver that causes system instability on the server, user can restore or roll back to the previous device driver.
4. Domain Rename – This supports changing the Domain Name System (DNS) of existing domains in a forest
5. Reduce risk of frequent server hang and crash problem.
6. New environment allow plug and play option that help hardware readily available for use.
7. Disk quota can be assign against individual clients.
8. File encryption is available in the new system.
9. Centralized user authentication and authorization.
10. Increase server performance. For example file and web server performance is two times faster than Windows NT 4.0 Server.
CHAPTER SIX
CONCLUSION
Information is treated as one of the most important enterprise resource or factor of production. And Transcom Electronics Ltd.’s performance has a direct relationship with the amount of accumulated and processed information that affects theirs competitiveness and is treated as a strategic asset. The strategic assets are used to produce information based on different department’s activities. The key technology of the information process here is TEL’s organized VLAN with a migrated Windows 2003 server system that allows the Internee to study the said topic
At present TEL have been updating their existing system in other offices to give a dynamic look to get the optimum performance.
Intern’s personal experience of this Internship program was very exciting and full of great pleasure to work with ISA department of Transcom Limited.