Making a presentation puts you on public display. An audience not only listens to your ideas, it also responds to the way you use your voice and your body. You need more than a well written presentation to make an impact. You will also need to deliver it in a lively, flexible and interesting way. In this leaflet we suggest many ideas for invoking energy in your presentation style. Students are often asked to give presentations at university (either individually or as part of a group). This is a useful process because presentations;
- offer different viewpoints on a topic
- act as good practice for job interviews and the world of work
- allow some people to present themselves better verbally than on paper
- can get discussion going
- can help you to boost your confidence
Often presentations are relatively short (between 5-15 minutes), therefore it is important to:
- Be concise
- Select a few key example
- Structure the presentation clearly
- Provide signposts or cues
- Repeat the key points and to summarize them at the end
Preparation for the presentation
Prepare materials in the same way as you would prepare for an essay (more information).
In summary:
- Analyse the question
- Summarise the task
- Organise and plan (identify the key topics, look at what resources you have, find resources for the gaps)
- Find sources of information (you may wish to start with something general to gain an overview of the topic)
- Read and make notes
- Carefully structure your key ideas and take each one in turn to identify key points to make in your talk
Some other points to consider for preparation of the presentation:
- Prepare only what you can deliver at a slow pace
- Think about what your audience (What they already know; What they will want to know, How to attract their attention and What relevant examples may engage them)
- Divide the information into the key areas (only cover general, key points and provide a few key examples)
- Include a strong final summary
- Think carefully about visual resources, for example handouts and slides
Mindmapping
You may wish to try using a mindmap for planning your work. You could also include a mindmap to present as an initial overview for your audience to show the key points you are going to raise.
Prompts and visual resources
Think carefully about what will help to prompt you. Some examples are included below:
- Index cards
- Overhead transparencies
- Powerpoint
- Handouts
- Artefacts
- Music
Prompts
Think carefully about the type of prompt you use. You do not want to ‘read out’ every word from a page or screen. It is important to be familiar with your topic beforehand, which will both give you confidence, and also mean that you are able to convey the information effectively without reading. Additionally, if you struggle with reading, you may knock your confidence in a presentation by putting pressure on yourself to read detailed information. Below are listed some suggestions for prompts:
Index cards
This is useful if you know a topic well, but just want a few handheld prompts – you could use bullet points on a series of index cards. It is wise to number the cards in case they are dropped or become jumbled up
Overhead transparencies
You may wish to use these to provide a structure or overview of the topic and to present them to the group. You could include some simple key points and work through them in order. It is advisable to number them and to be clear about:
- The availability of the projector on the day
- How the projector works
- Which way the slides go on
It is often possible to print onto certain types of overhead transparency (acetate). There are several types of acetate available for:
- Handwriting
- photocopying
- printing
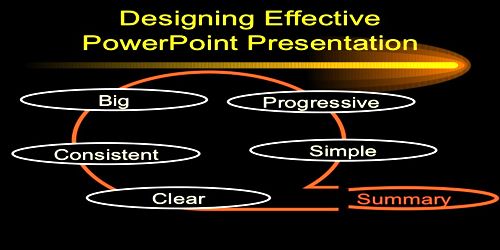
Powerpoint
You may wish to structure your talk to provide a step-by-step summary of each of your key points in Powerpoint. It also offers the facility to produce handouts taken directly from the slides you create. If you use Powerpoint, it is advisable to:
- Use a large font (at least 32 point is recommended)
- Keep it simple and avoid flashing or moving images/ graphics, unless they are essential to your point
- Use the Powerpoint slides sparingly (one for ever 3 minutes or so of the talk)
- The availability of a computer, and multimedia projector on the day
- Practice using the technology
- Have a back up plan in case the technology fails on the day
Visual/ supplementary aids
You may wish to present visual aids to the group, for example graphs, charts, images, a few key quotes or an overview of what you hope to cover. Think carefully about how you will present these. If you are using Powerpoint or overhead projector as a prompt, you can incorporate these into that medium. Other supplementary aids that you may wish to consider are:
- Handouts (you may want to provide each of the students and your tutors with a handout to support the key points that you raise)
- Artefacts (you may choose to hand out objects, artefacts or other practical resources, for example for a graphic design presentation, you may pass round examples of good design and poor design)
- Music (this could set a certain mood as students enter the room, or you may choose to use specific examples of music to illustrate a point if you are giving a creative presentation). Again, check that the technology to support this will be available on the day, and also practice how it works.
Overcoming nerves
Some people find giving a presentation a nerve wracking experience. Careful preparation and practice can help alleviate nerves. Some tips include:
- Produce a script to practice from (do make sure that you destroy it before your talk, or there will be a temptation to ‘read it out’)
- Go over the information alone several times
- Practice delivering the presentation alone and time it
- Rehearse in front of friends or family and again, time it. You may need to adjust the content to fit the timescale (see below for a practical feedback checklist you may wish to use)
- Alternatively, you may have access to a video camera and wish to video record yourself delivering the presentation (see below for a practical feedback checklist you may wish to use)
- Make a conscious effort to relax –you may wish to try breathing techniques
- Make a task list of what you need for the presentation and check that you have everything to hand on the day
- Arrive early
- Be in the room before everyone arrives. Smile at everyone as they arrive
- Have a glass of water to hand
Giving the talk
Consider how you will handle the following beforehand:
- how you are going to stick to the time – you may wish to make someone your timekeeper and prompt you, for example after 5 minutes has passed and 1 minute before the end.
- How you will handle questions. Usually, it is easier to point out at the beginning of your talk that you will take all questions at the end. Make sure that you include time for this. You may also wish to consider possible questions that your audience might ask and suitable responses to them.
- How you will organise your space – for example where you will stand, where you will store any visual aids, how you will distribute materials, seating arrangements for your audience.
Giving the talk – things to remember on the day
- Wait until all are quiet
- Use a prompt (cards, Powerpoint, OHP slides), not reading
- Speak slowly and loudly
- Do not apologise
- Make eye contact, or at least look up
- Start by saying what you’re going to cover/ do
- Go through your prompts in order
- Stop and breathe after each point
- Sum up at the end
- End on a good line. If unsure, simply smile and say “Thank you”.
Reviewing your presentation
At the end of your presentation, it is often tempting to forget about it and ‘put it all behind you’, but some reflection is advisable, in order for it to act as a learning experience.
Some ideas for review and reflection include the following steps:
Immediately afterwards
- Congratulate yourself for bravery and getting through the experience
- Try not to focus too much on the negative aspects
Shortly afterwards
- Think about your strengths – what went particularly well? What could you draw on for next time? For example, if you found the use of visual aids particularly useful as prompts, you could consider using more of these.
- Think about your weaknesses – what did not go so well? Was it structure? Was it content? Did you answer the brief?
Information Source: